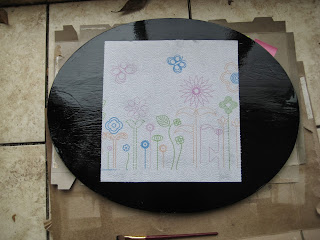
I had in my house a small, three foot night stand or round table. This table had seen better days. When i found it hiding under the couch, the top was separated from the stand. Thanks to Christmas and my crafty streak this semester (i have made snowman ornaments out of burnt out light-bulbs!) I thought of what I could turn the table into for a special someone. It did not take very long. My boyfriend has shared with me multiple times about how he would love a game table similar to my parents at home. He loves chess and before I decided to use this table for a Christmas gift, I decided I would simply buy him a chess board from lovely Wally World. Hand-made crafts are so wonderful for both sides of the exchange!
Oky enough back story and on to the craft! :)
Materials you will need:
- Table top or wooden board
- place you will nail, glue, staple the board on to when finished
- nails, hammer
- wood glue
- staple gun
- base color spray paint
- gloss or top coat spray paint
- wood or outdoor acrylic paint
- have a color that matches spray paint color
- paint markers or sharpie color of base coat or black
- Ruler or flat edge
- measuring tape
- paper towel (optional)
Step One:
Measure out how big you would like your board to be. See how it will fit equally on your table. Pencil is great to write out measurements and where you would like to place it. I had it easy I discovered that the size board I wanted matched a square sheet of paper towel!! 10.5 X 10.5 inches.Step Two:
Step Three:
When the paint is dry, measure out how many squares you need. A chess board is 8 squares by 8 squares. !0.5 inches is a weird number to divide into 8 segments but in centimeters that is 26.67. I divided both numbers by 8 and figured that centimeters would be easier to measure out than inches. Mark small lines around the board. the lines should line up with the opposite side of the board.
Step Four:
Use a flat side, a rule, thick paper, and connect the lines as straight as possible. I discovered that after making the lines in one direction I made shorter connecting lines in the perpendicular direction instead of using a ruler or flat edge. the choice is up to you!
Step Five:
Paint the squares! Wait until one color is done before painting the next set of squares unless your base coat is the other set of squares.
Step Six:
After squares are finished and dried, I noticed that the squares were uneven, not neatly lined up...just not as nice as i wanted. I should have expected that since i do not have the straightest hand. I took a black paint marker and slowly drew in the lines to sharpen out the edges and corners for each square. This also showed me where i need to touch-up my paint. for example a teal seeped into the white square or vise-versa. This resulted in sharper edges and neater lines. Not perfect but much nicer looking!!
Step Seven:
Spray with finishing coat or protective gloss! This will allow for cups, outdoor weather, whatever environment you decided to place your new game table to be protected and ready for anything thrown at it besides being thrown itself. haha
Step Eight:
if your base is not already attached, when the paint is dry, then attach the base to the table. Mine started out with nailing with broke the wood of the base due to age and past stress. I ended up using super glue and twine to tie and hold the base on the table haha. Whatever works!
ta-da now you have a completed and ready to use table...but NO pieces! in short I used river rocks left over in my garage and I bought a bag of them at goodwill for 50 cents. using the same paint markers i used on the table and my snowmen crafts I drew the desired shapes and pieces as pictured below. i also sprayed the rocks with the finishing spray to prevent the paint from chipping off. Take note each side of the board will have 16 pieces: 1 king, 1 queen, 2 rooks, 2 bishops, 2 knights, then 8 pons. and that is just one side! total a chess board has 32 pieces.
Some cool tidbit I discovered... there is no official chess board size. Apparently chess boards are suggested to be made to the size of the pieces but the standard size for a chess square is 2.5 inches at max.
With the quote as a guideline...my chess board is obviously NOT regulation standard. but that is oky because I am not expecting my board to be used in any chess competitions. :)


I LOVE ITTT!!!! :) Keep up the creative juices!
ReplyDelete